Showing posts with label Equipment. Show all posts

Thursday, May 19, 2016

Brook Trout and a Broken Rod

Today I spent a few hours on a stream in Central MA. I fished this stream for the first time this past winter, so I was excited to see how it fishes in warmer weather.

Mt. Wachusett Fly Fishing
Mt. Wachusett
I arrived and found the water level low, but quite cold, probably somewhere in the 50s. For now the trout are ok, but if we don't get some rain soon the temperatures could start rising fast.

The low water made fishing a little tricky. I had to focus on stealth because most of the trout were holding in shallow water. Fortunately the gradient of this stream is somewhat steep, and the fast-moving water helped mask my movement.


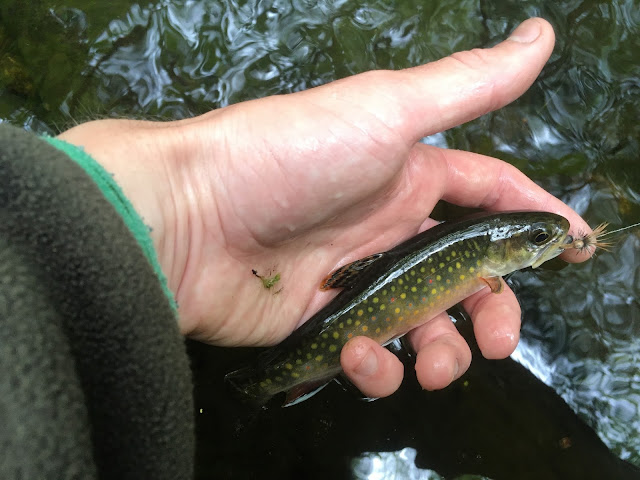
I saw some trout rising under the road bridge where I entered the stream. I put my elk hair caddis near one of the rises and soon had the first, and biggest, fish of the day on the line, a brook trout around 8". He unfortunately didn't want to be photographed.

Central massachusetts wild brook trout stream

I decided to walk downstream for a bit and then fish back up to the bridge. Most of this stretch was skinny pocket water, but I was able to find quite a few deeper pockets with willing fish.

Central massachusetts wild brook trout

About halfway through this stretch tragedy struck - during an attempt to free my fly from a tree, I smacked the rod tip into a rock, and the first ~2" snapped off. I've heard of people fishing without their rod tip, so I decided to give it a shot. It actually casted quite well and I was able to land several more fish with the broken rod.

Central massachusetts wild brook trout

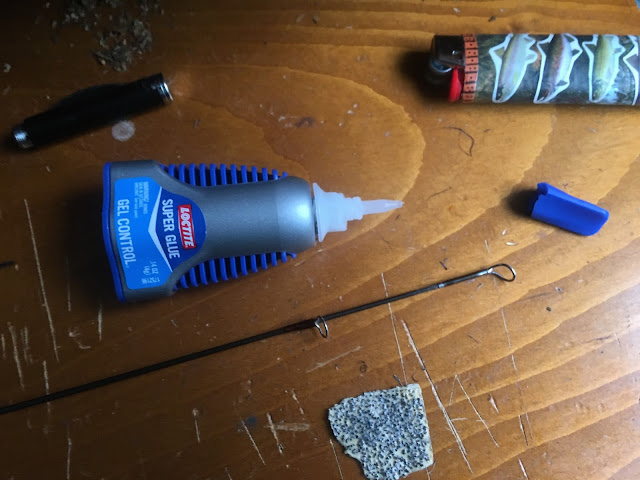
Echo has a lifetime warranty which will allow me to get the rod fixed for $35, and I will take advantage of that, but I want to use the rod on Saturday, when I'll be traveling to a remote pond in the White Mountains. I read online that the tip top guide can be removed and replaced onto the broken rod, so I gave it a shot. A lighter, some sandpaper, and a little super glue later, and my rod is fully functional. I took it out for some backyard casting practice and I couldn't tell the difference.

Repairing a broken fly rod tip
A finished repair

Saturday, October 10, 2015

A JT Special Variant

I was inspired by Jo's recent post on FlyFishMA to put my peacock herl to good use. I decided to try to imitate Jo's streamer pattern - the JT Special.


I didn't have any white marabou, so I substituted white crosscut rabbit, which I palmered and then propped up with my thread to form a wing. The final appearance is pretty similar to the original, but it will be interesting to see how the action of the rabbit in the water compares to marabou. In my experience, marabou compresses more in the water, but also moves more, so my variant will likely be a little fuller-bodied, but with less movement.

I can't wait to give this fly a shot at the Swift this winter!

Sunday, May 10, 2015

Balloon Indicators

Swift River rainbow caught under a nitrile glove balloon indicaor
Nymphing is difficult and not particularly effective in the small streams I fish in MA, so I didn't have much practice before coming to the Driftless. Realizing the abundance of scuds and nymphs in the spring creeks here, I decided I needed to learn how to fish nymphs.

I started out using indicator putty, but I found that it didn't float well and frequently fell off the line. Next I tried the ubiquitous Thingamabobber, and while I liked the way they float, I found them hard to adjust and frequently spooked fish with the loud splash they tend to make when they hit the water.

In researching alternatives, I found that the Thingamabobber was inspired by some guides who use water balloons partially inflated with air. The consensus seemed to be that balloons land more softly than Thingamabobbers, but that they are even harder to adjust, as the only way to attach them is with a slip knot.

Luckily, I found this article, which describes a variation of the New Zealand strike indicator, only using a balloon instead of yarn. I won't go into detail on setup, as the linked blog has that covered.

Here's a few variations I've found effective so far:

Trying different balloon materials. 

The standard balloon for an indicator is a water balloon. These work great, but I discovered this technique in November. Things may be different in warmer parts of the country, but here in Minnesota no one is selling water balloons in the fall, so I had to improvise. I tried standard party balloons, but it's nearly impossible to make a balloon smaller than an inch. That might work on a big river when you're using a ton of weight, but on the small streams I fish it's overkill.

Brookie caught under a standard water balloon indicator

Next I tried Nitrile Rubber Gloves. I was able to use the fingers of the gloves like mini balloons, so each glove provided 5 indicators. I was able to get these smaller than party balloons - the minimum size is probably about 1/2". The light blue color of these gloves should be good for spooky fish, but it could be tough to see in rough water. These indicators were also tougher than standard balloons - while the balloons tended to deflate over time and were easy to puncture, the glove indicators have remained undamaged for months.

My final test material was balloon art balloons - the long skinny ones clowns use to make hats and animals for kids. These were nice because you can tie very small indicators (down to about 1/4"), and you can make many from one balloon. I found that these lost air rapidly (within ~24 hours), but you can cinch the line down on the balloon itself rather than the tag of the knot, which will usually blow the balloon back up. So long as you store in it's partially deflated state, it won't deflate any further.

A variety of balloon indicators made from Nitrile Gloves (blue), 
water balloons (top, multiple colors), and balloon art balloons (bottom, multiple colors)

Pen tubes for tubing.

You don't need to buy the New Zealand Strike Indicator tool or any special tubing. I've been cutting small pieces of the ink tubes of ballpoint pens (the small tube on the inside, not the outer pen tube). These work perfectly, and you're almost guaranteed to have access to an old pen you can cut up for free.


Luckily dry fly season is upon us, but nymphs will still catch fish!


Tuesday, April 7, 2015

Perfection Loops

I recently learned to tie the perfection loop knot. It's usually used to create a loop at the butt end of the leader, and it works great for that purpose, but I've been tying them into the tippet end of my leader. This way I can attach pieces of tippet quickly and easily with an improved clinch knot. This is the great in cold weather when its hard to tie more complicated knots.

Here's a good animated tutorial to tie the perfection loop.

When I tie a loop the end of my leader I try to make the it as small as possible. I tie the knot loosely at first, then feed extra line from the loop into the knot and pull out slack with the tag end.

See Diagram:
I usually put a thumb tack through the loop into my desk as I tighten the loop. It helps protect the slipping through the knot as I tighten and it's about the same diameter as the loop I want. It took me a few tries to get it down, but overall I find this knot fairly easy to tie. I've appreciated the easy tippet changes and longer leader life this loop provides. My only worry is that it may not be as strong as conventional knots,  but so far I haven't had a problem.

This probably isn't the most conventional set up, but I'm fine with unconventional if it functions the way I want.